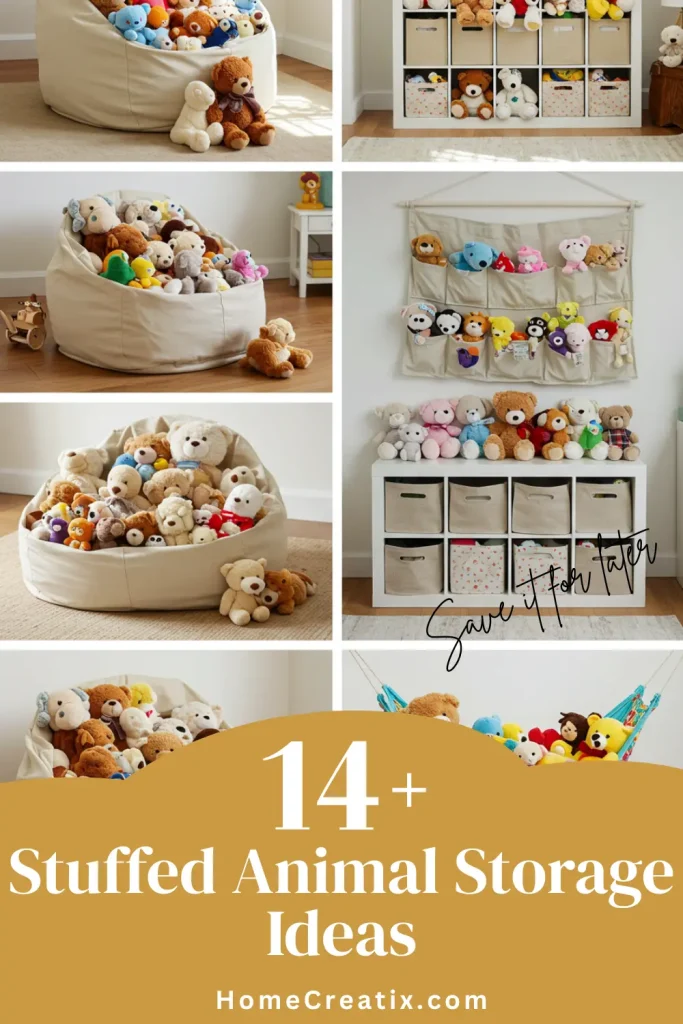
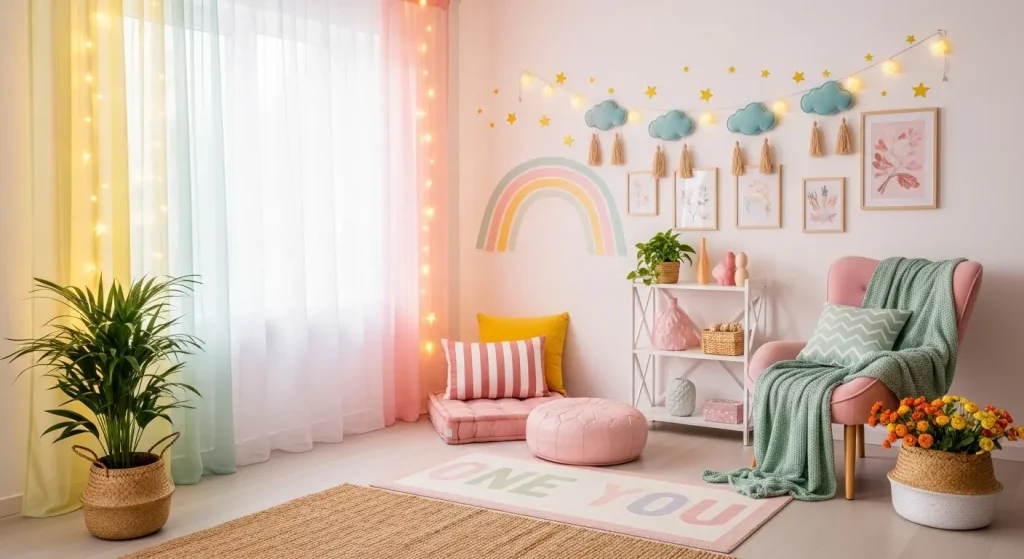
Stuffed Animal Storage Ideas: 14+ Easy Solutions for a Neat and Tidy Room
Stuffed animals bring comfort and joy, but they can also create clutter. For seniors, organizing these cherished companions can be both a practical challenge and a creative opportunity. This guide presents 14+ clever storage solutions that not only declutter spaces but also elevate the charm of each stuffed animal.
Crafting these storage solutions can be a delightful activity, allowing seniors to engage their creativity and personalize their living environments.
From DIY shelves to whimsical baskets, these ideas encourage self-expression while making it easier to access their favorite plush pals. Let’s dive into these imaginative ways to keep beloved stuffed animals organized and accessible!
Over-the-Door Shoe Organizer

This delightful over-the-door shoe organizer project combines creativity with practicality, making it perfect for seniors seeking engaging activities.
The process uses easily accessible materials and straightforward techniques that accommodate various skill levels.
Whether you’re a beginner or experienced crafter, this project offers opportunities for personal expression while creating something both beautiful and functional.
Bungee Cord Shelves
This delightful bungee cord shelves project combines creativity with practicality, making it perfect for seniors seeking engaging activities.
The process uses easily accessible materials and straightforward techniques that accommodate various skill levels.
Whether you’re a beginner or experienced crafter, this project offers opportunities for personal expression while creating something both beautiful and functional.

Floating Shelves
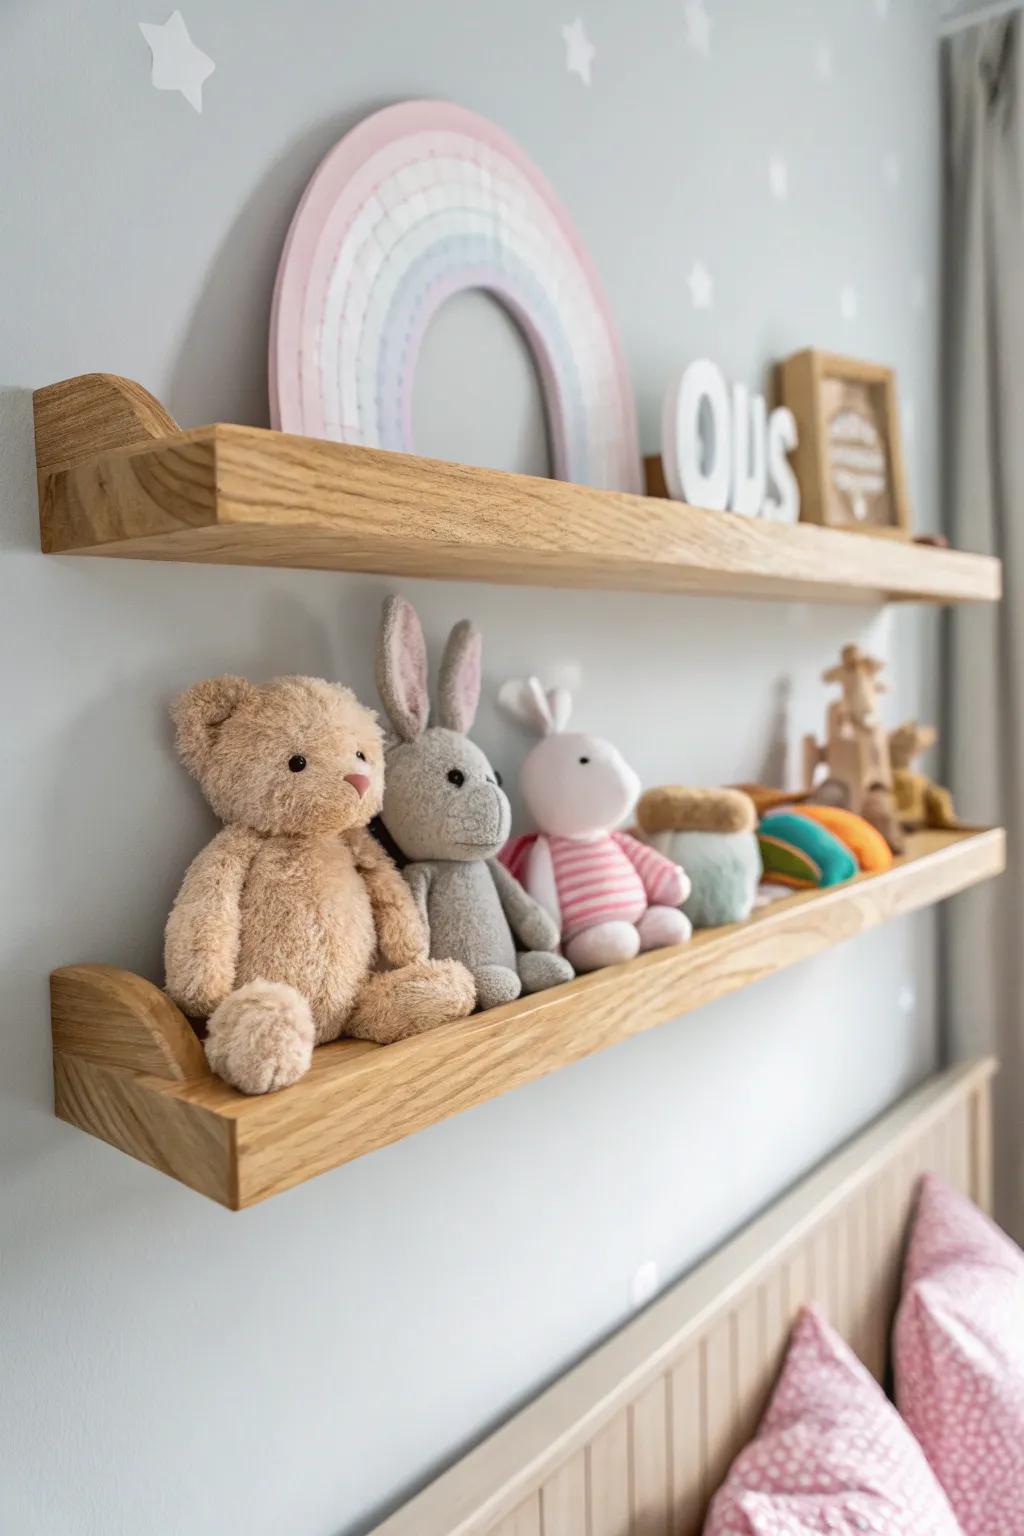
To create charming floating shelves for displaying stuffed animals, gather materials like wooden boards, brackets, screws, a level, and a drill.
Choose lightweight wood to ensure easy installation. Measure the desired height, ideally at a child’s level, and mark the wall where the brackets will attach.
Drill holes and secure the brackets, then place the shelves on top, ensuring they’re level for a neat look.
This project not only organizes toys but also enhances the room’s decor.

Corner Display Shelves
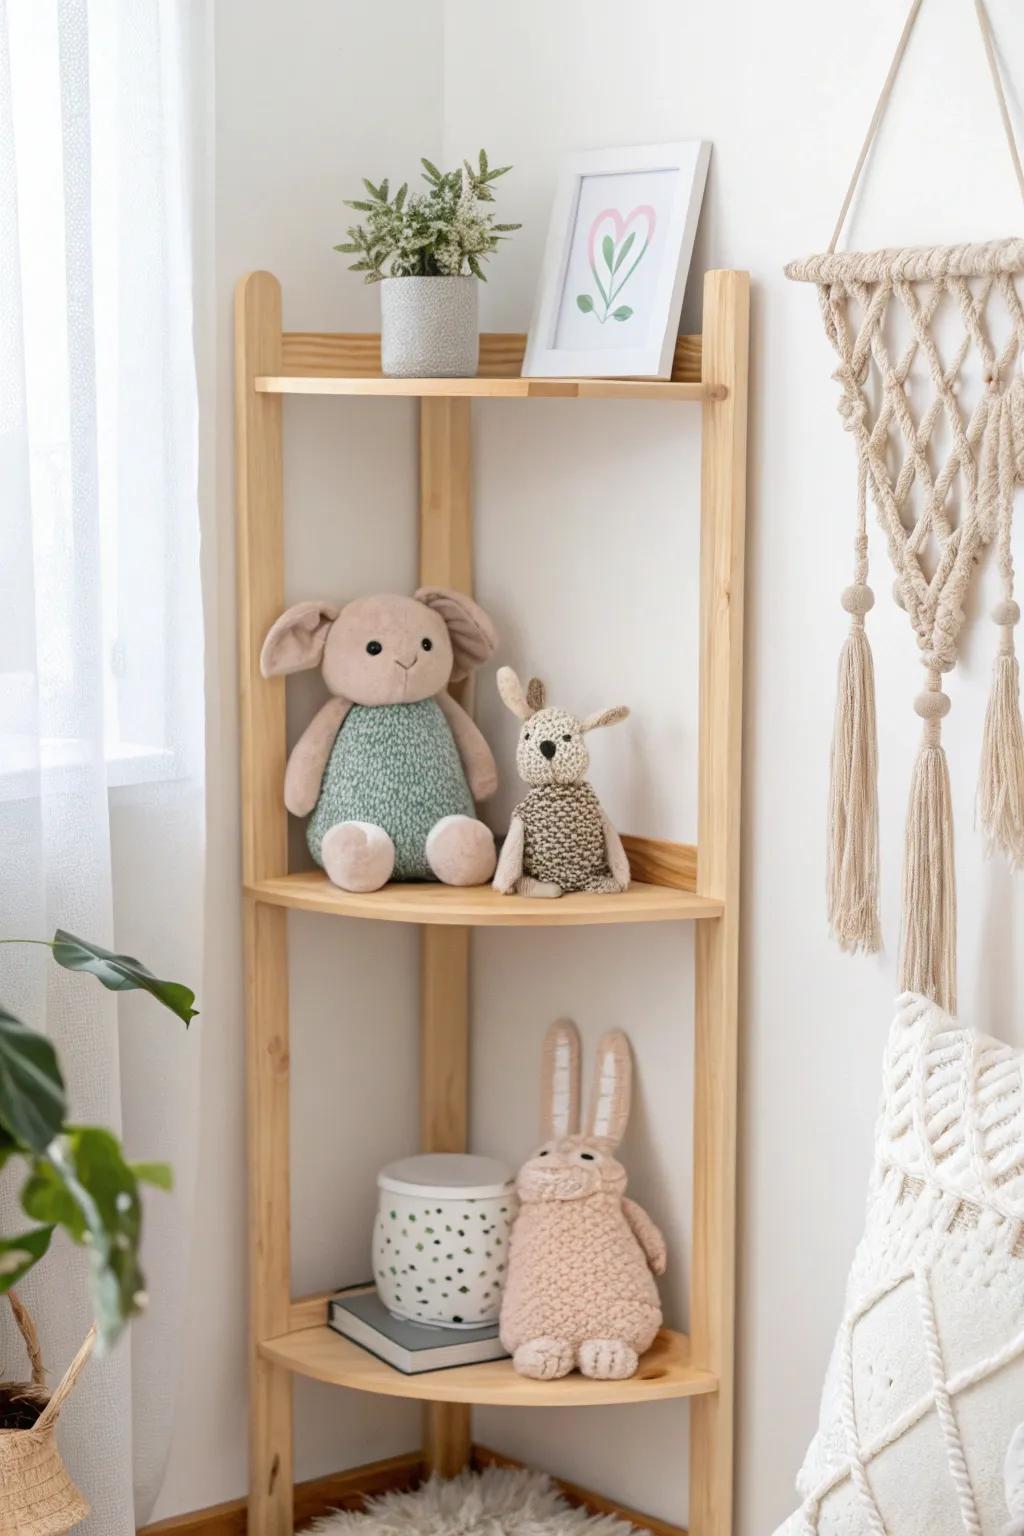
Transform unused corners into charming displays for your stuffed animals with simple corner shelves.
For this project, gather materials such as wooden boards, brackets, screws, and a drill. If you prefer a modern touch, consider floating shelves. Start by measuring the corner space and cutting the boards to the desired length.
Secure brackets to the wall for wooden shelves, or install floating shelf supports according to the manufacturer’s instructions.

DIY Stuffed Animal Zoo
This delightful diy stuffed animal zoo project combines creativity with practicality, making it perfect for seniors seeking engaging activities.
The process uses easily accessible materials and straightforward techniques that accommodate various skill levels.
Whether you’re a beginner or experienced crafter, this project offers opportunities for personal expression while creating something both beautiful and functional.
Repurposed Bookshelves
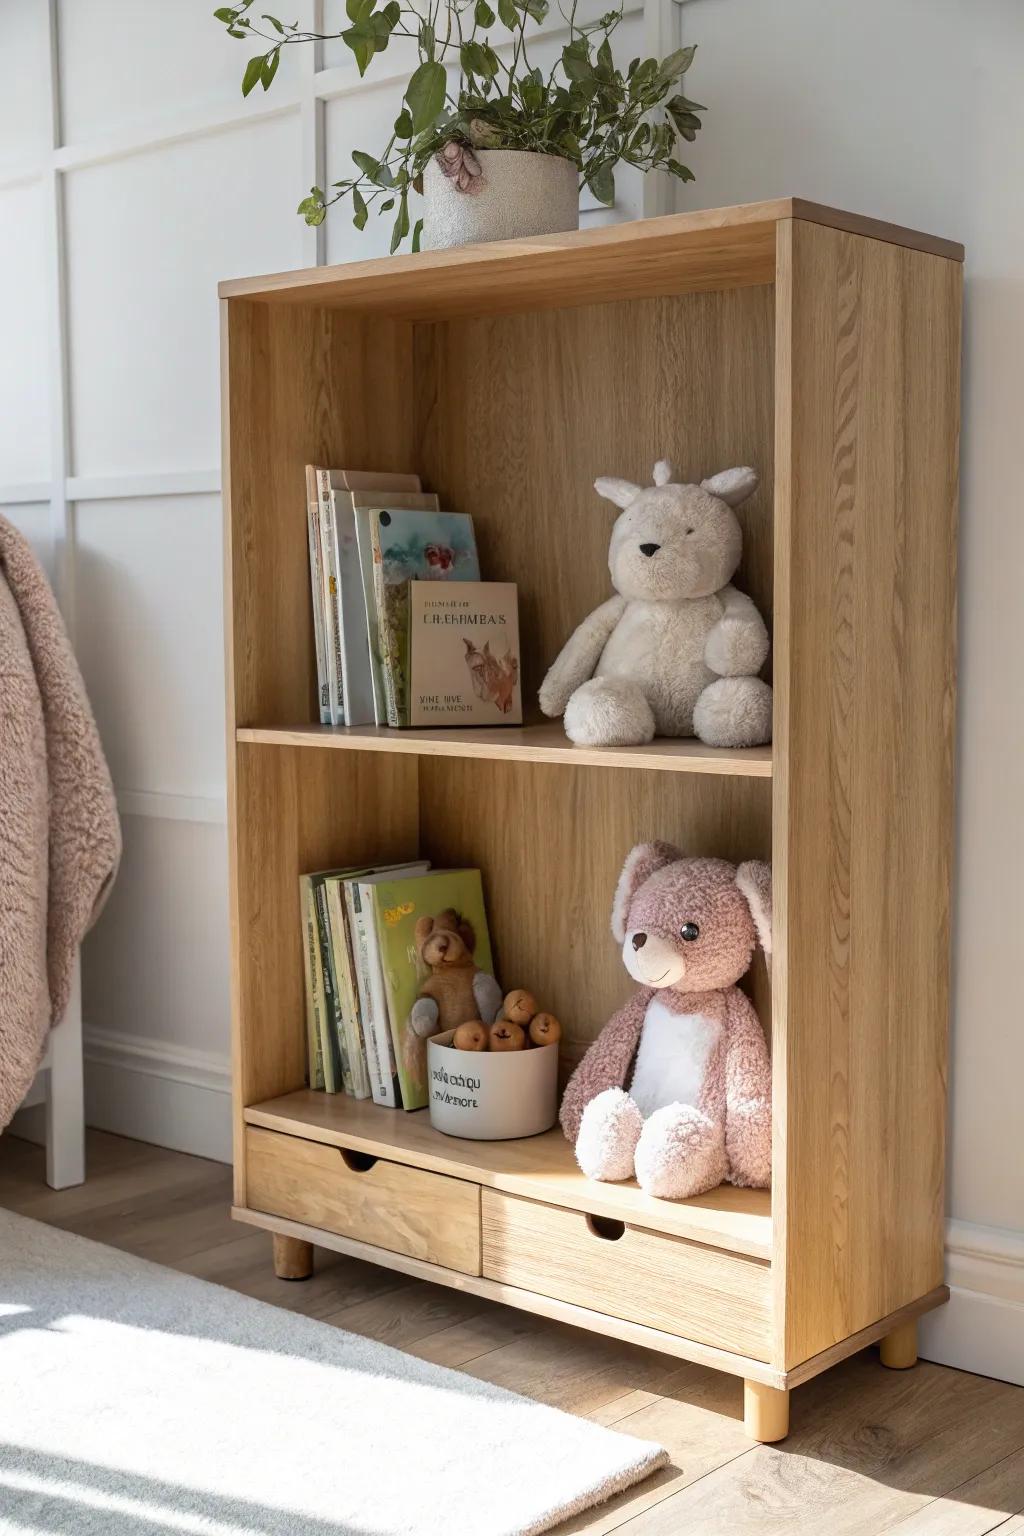
Repurposing old bookshelves into charming stuffed animal displays can bring both organization and warmth to your home. Start by gathering materials: an old bookshelf, wood polish or paint, and optional fabric for lining shelves.
Clean the bookshelf thoroughly, then apply a fresh coat of paint or polish to enhance its appearance.
For added flair, consider lining the shelves with colorful fabric or contact paper to create a cozy backdrop for your plush collection.
Utility Carts for Mobility
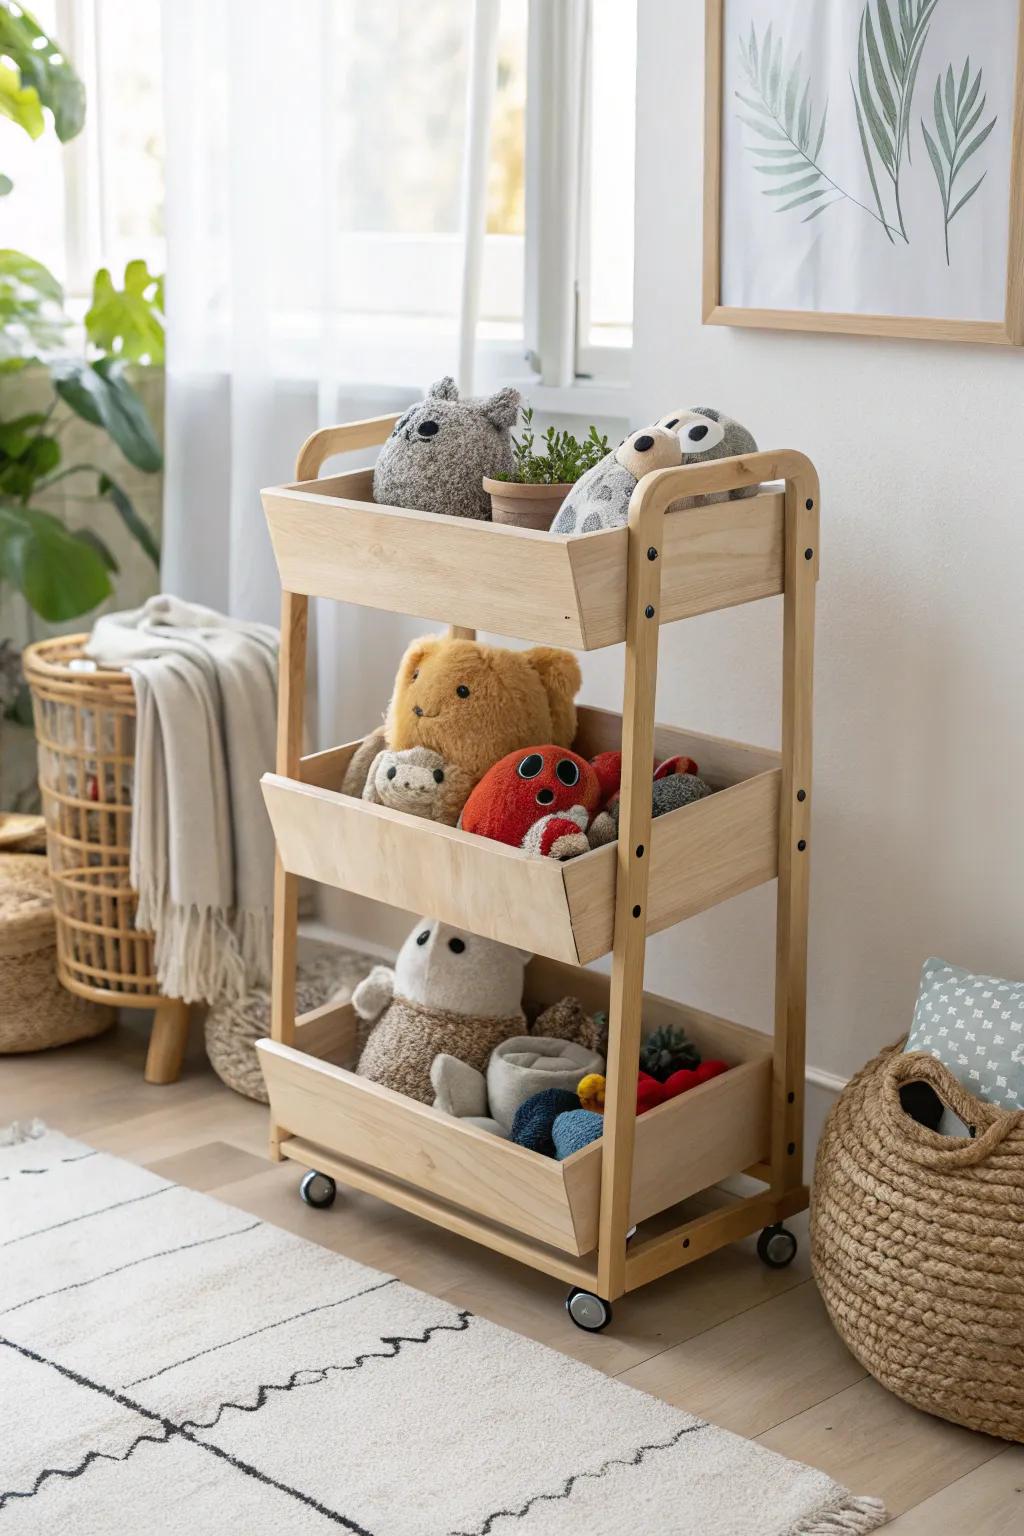
This delightful utility carts for mobility project combines creativity with practicality, making it perfect for seniors seeking engaging activities.
The process uses easily accessible materials and straightforward techniques that accommodate various skill levels.
Whether you’re a beginner or experienced crafter, this project offers opportunities for personal expression while creating something both beautiful and functional.
Stuffed Animal Chair
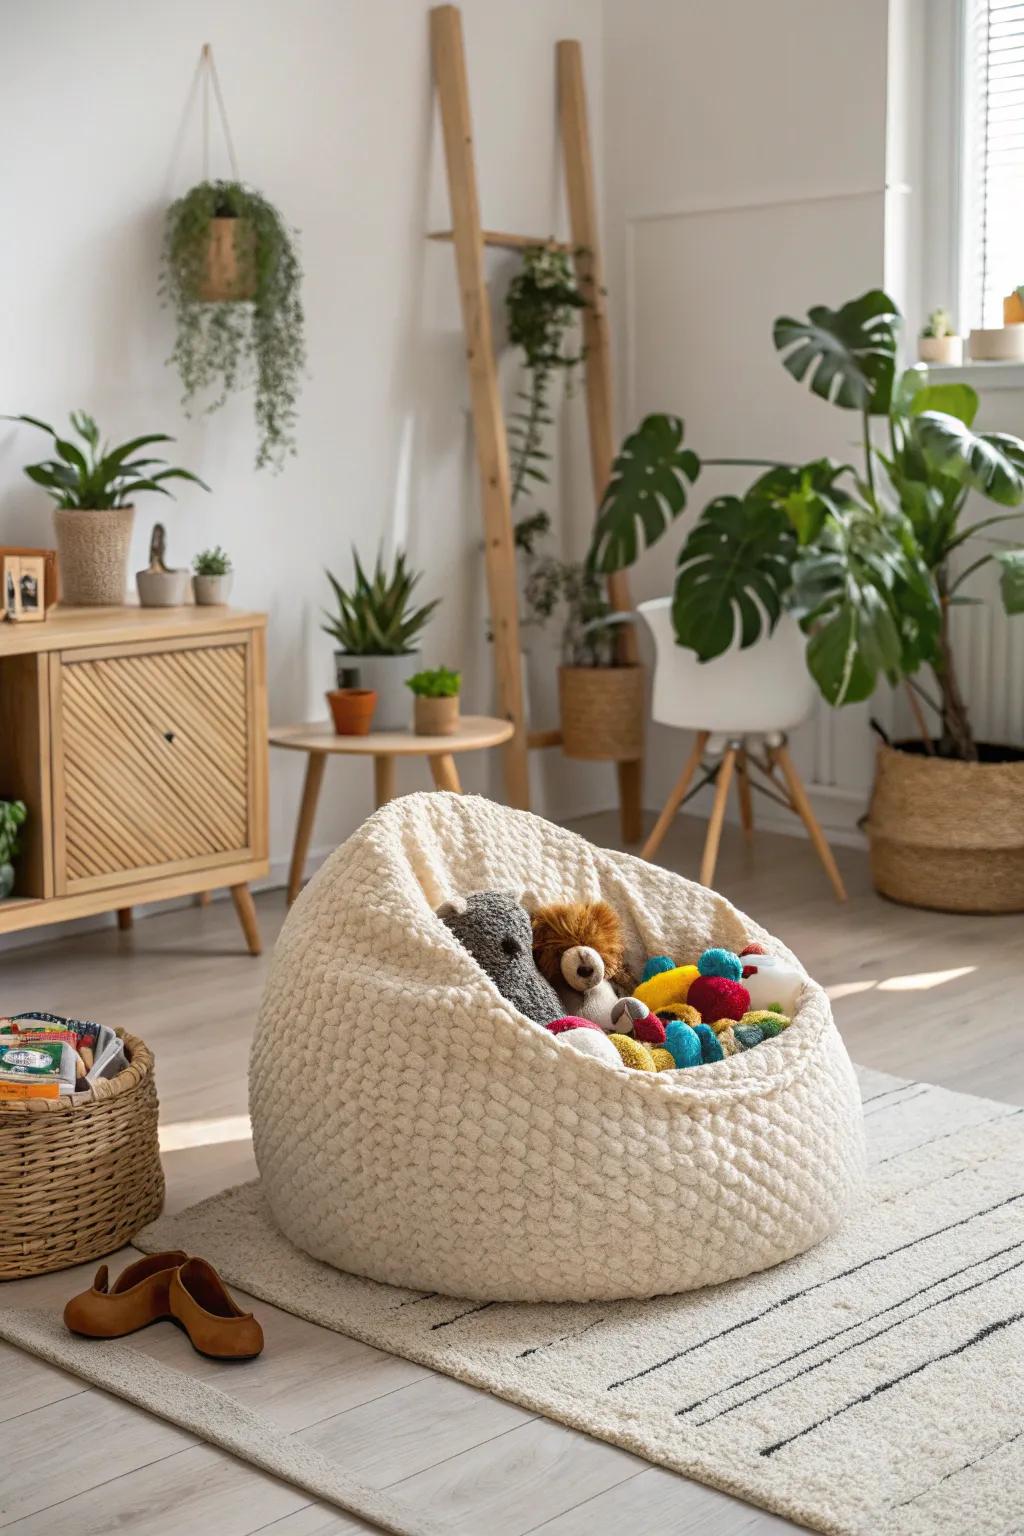
Creating a Stuffed Animal Chair is a delightful way to manage clutter while adding a cozy seating option for your child.
Begin with a cotton bean bag cover or a large stuffed animal storage bag. You’ll also need to gather a variety of stuffed animals, ensuring they’re clean and suitable for the project.
If you prefer, you can also sew a simple cover using durable fabric, allowing for custom designs that match your decor.
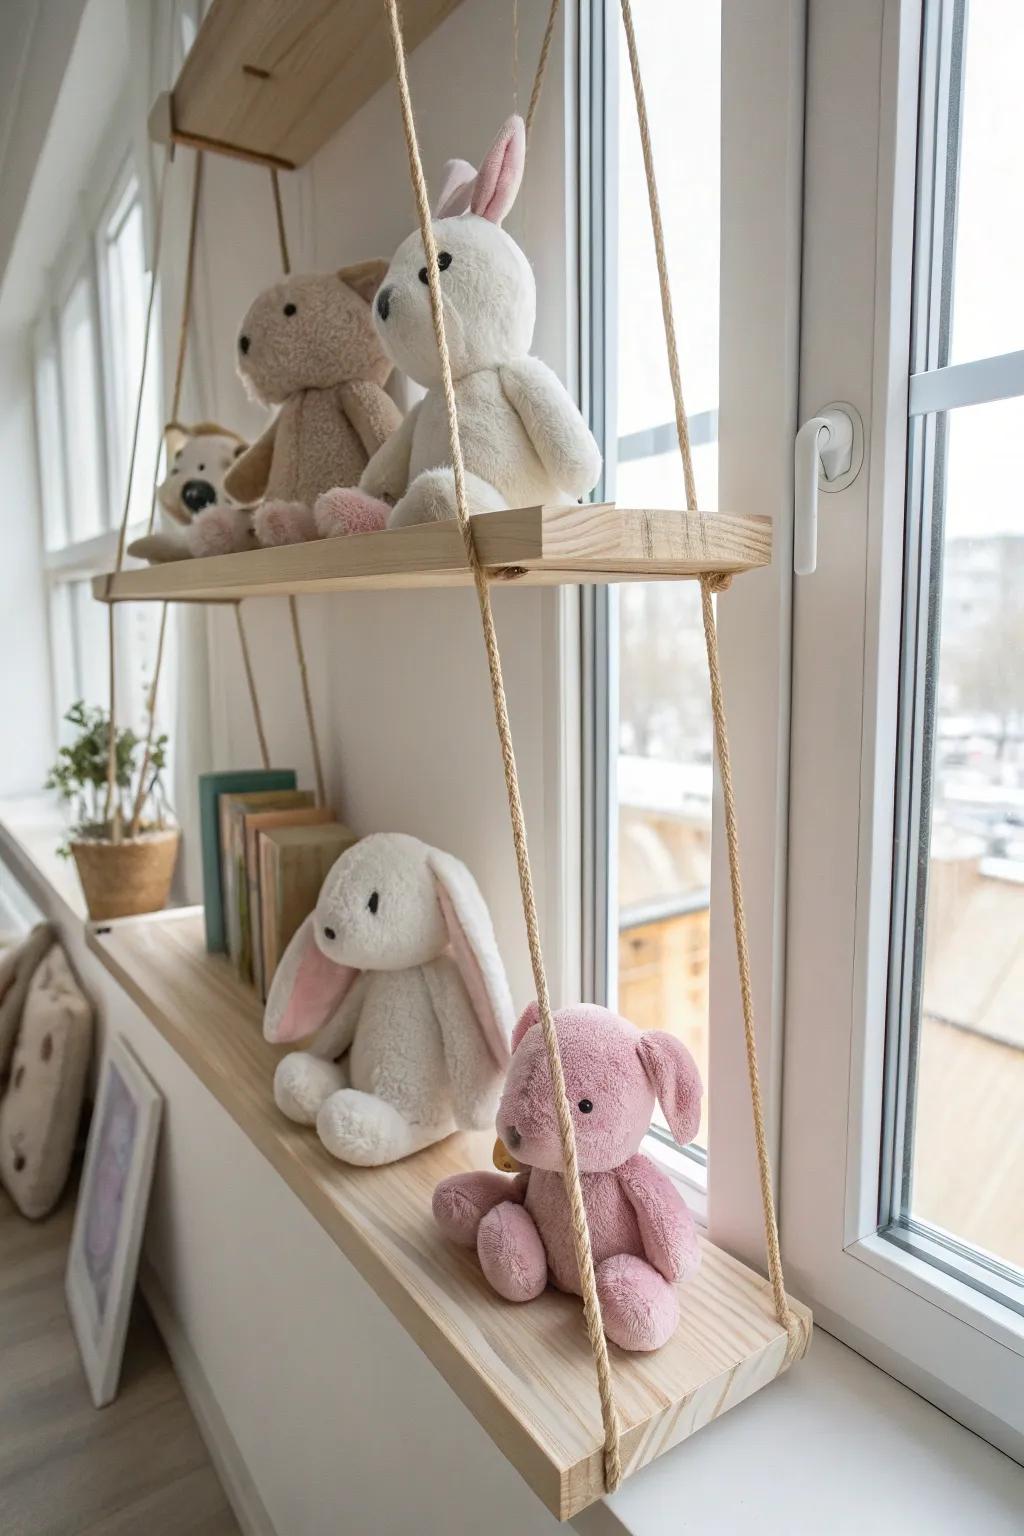
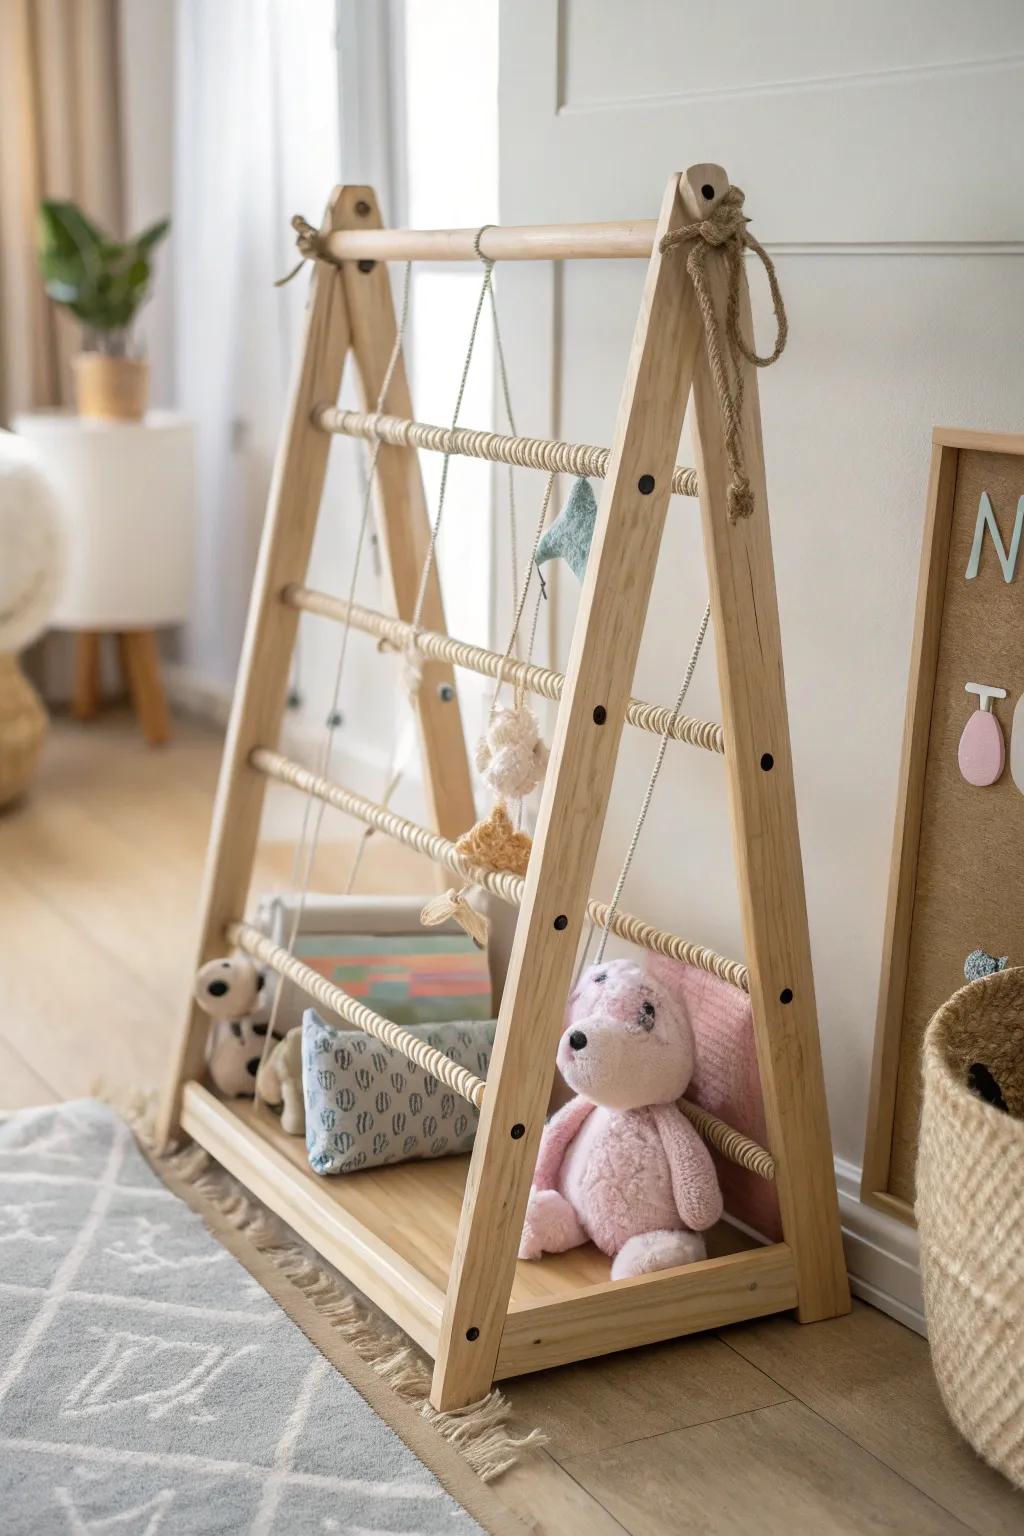
Stuffed Animal Swings
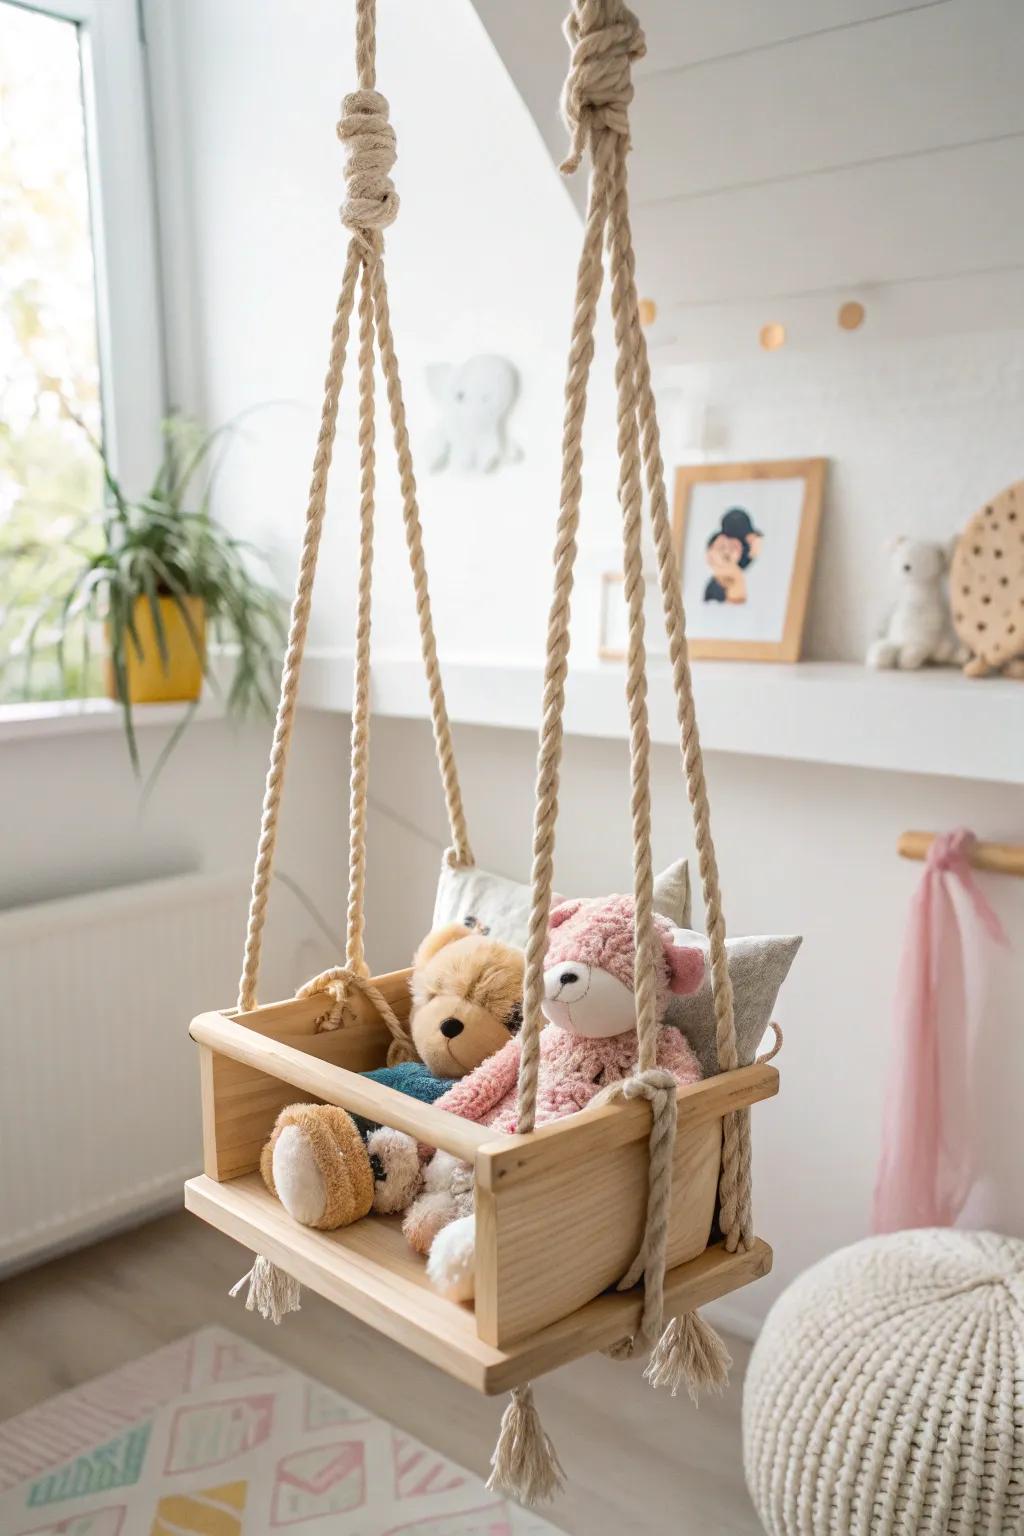
Create a whimsical stuffed animal swing using materials like a sturdy wooden dowel, decorative rope, and a few colorful fabric pieces.
Start by cutting the fabric into squares, then fold and sew them into small pockets to cradle your stuffed animals. Next, tie the rope to each end of the dowel, ensuring it’s securely fastened for safety.
Finally, hang the dowel from the ceiling or a wall hook, allowing your stuffed friends to sway gently, adding charm to any room.

Vacuum Seal Bags for Storage
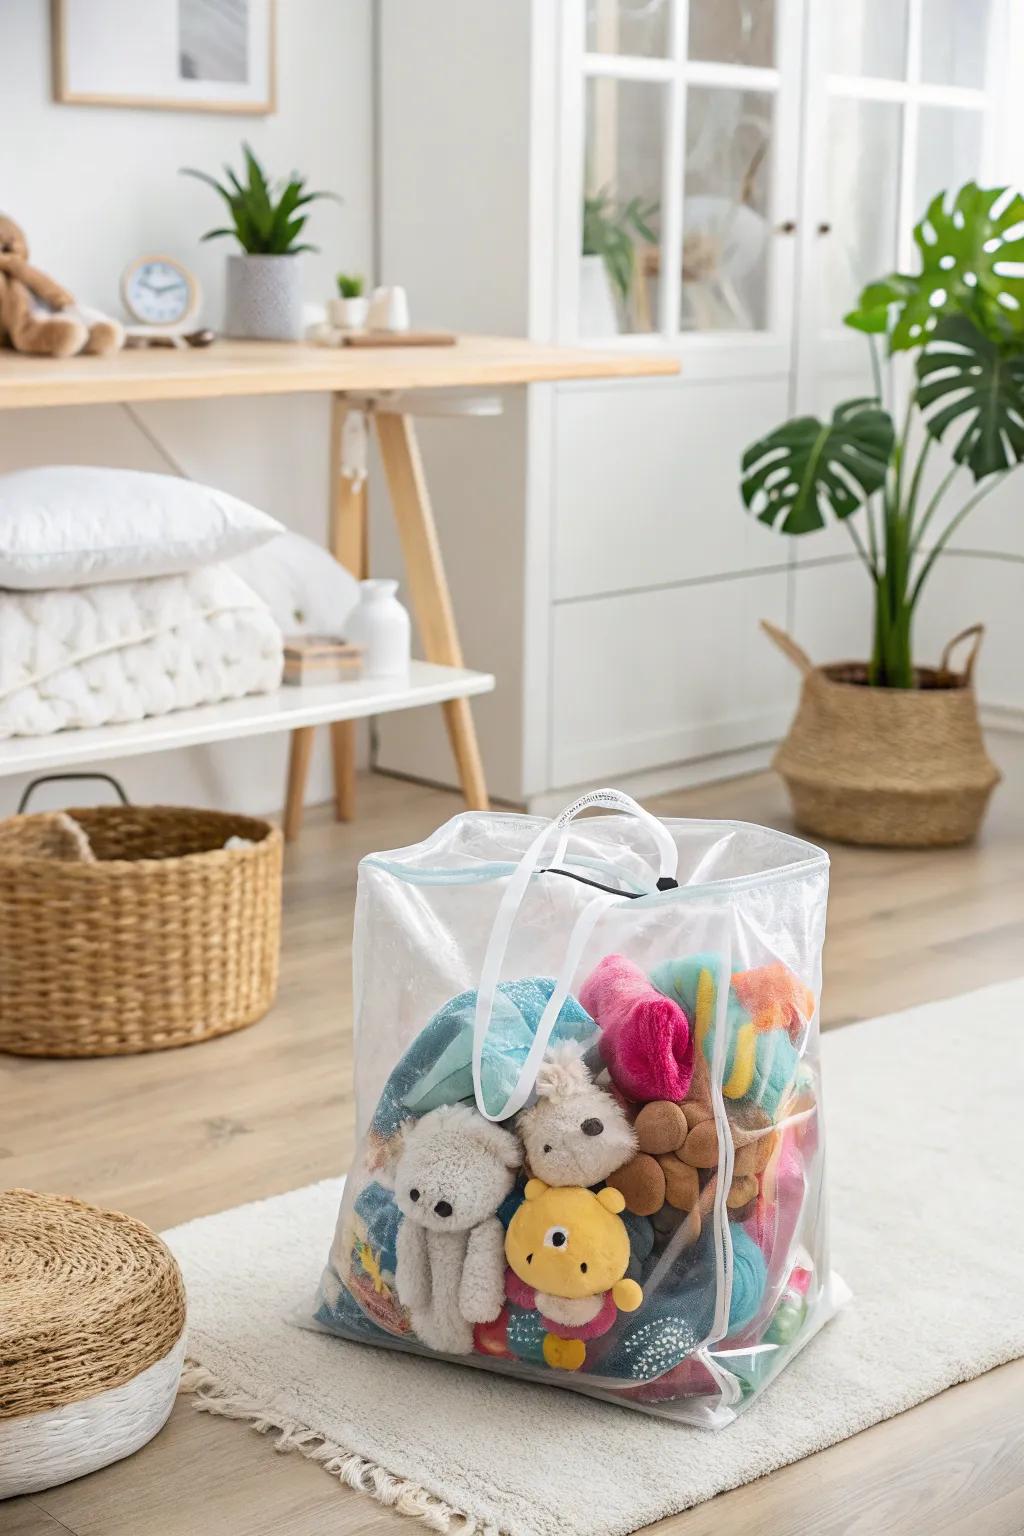
This delightful vacuum seal bags for storage project combines creativity with practicality, making it perfect for seniors seeking engaging activities.
The process uses easily accessible materials and straightforward techniques that accommodate various skill levels.
Whether you’re a beginner or experienced crafter, this project offers opportunities for personal expression while creating something both beautiful and functional.
Repurposed Toy Chests
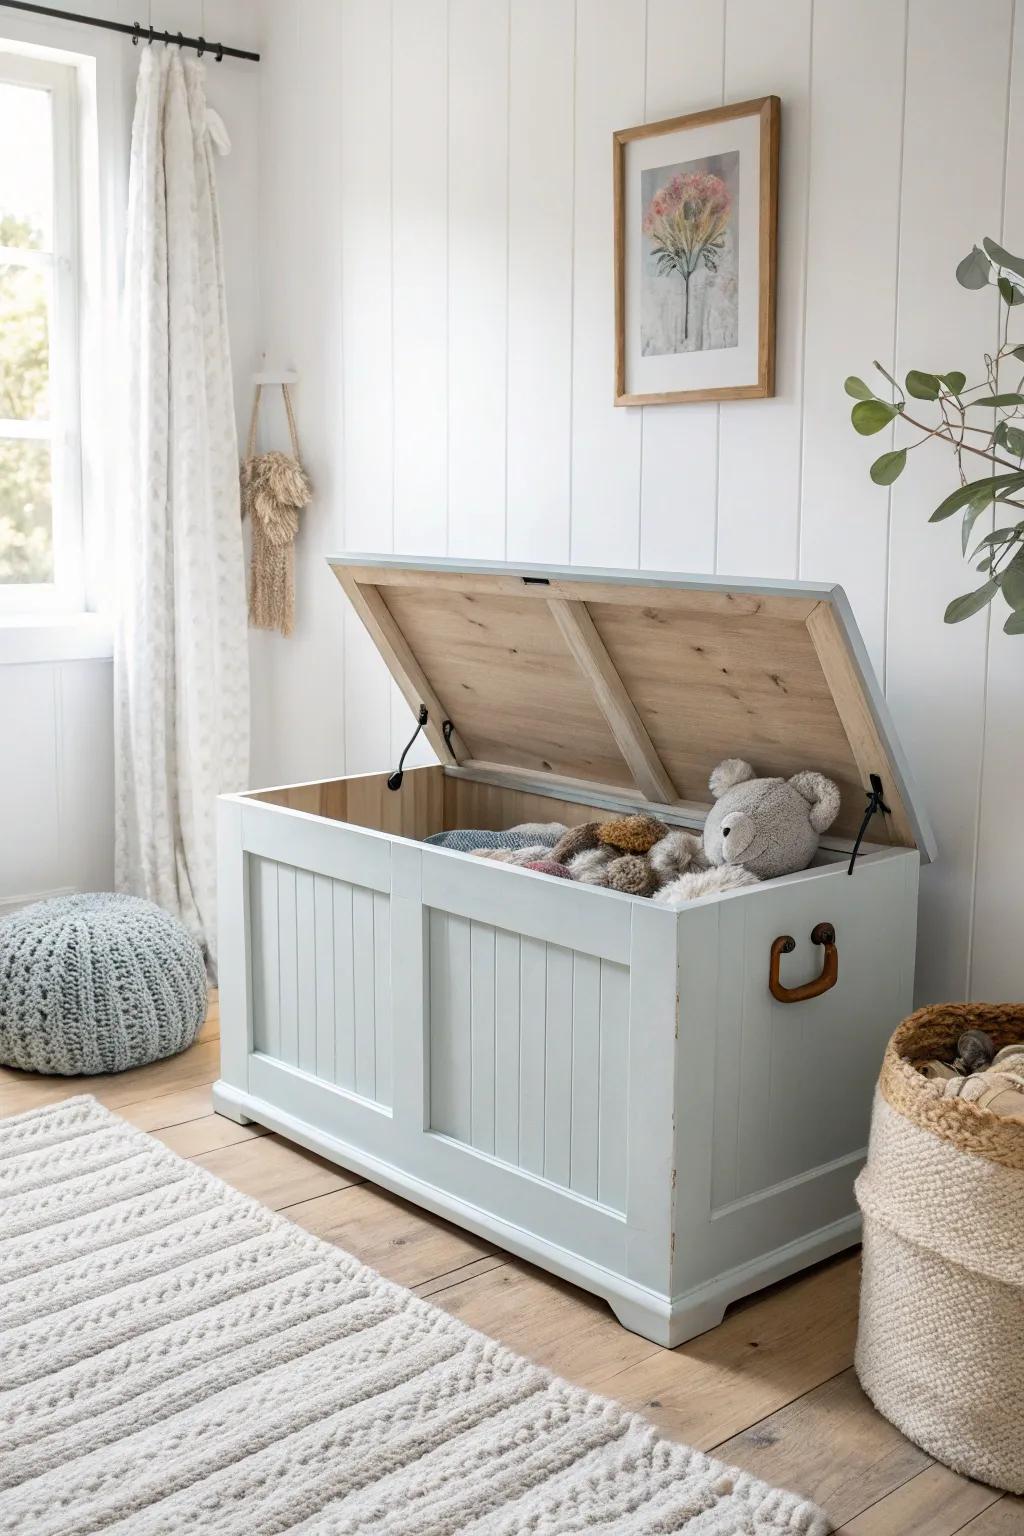
Transform an old toy chest into a charming storage solution for stuffed animals with minimal effort.
Begin by gathering materials: a sturdy, well-loved wooden chest, sandpaper, non-toxic paint or wood stain, and durable, child-safe hinges.
Start by sanding down the chest to create a smooth surface, then apply the paint or stain to refresh its look. Allow it to dry completely before replacing the hinges to ensure easy access for kids and adults alike.
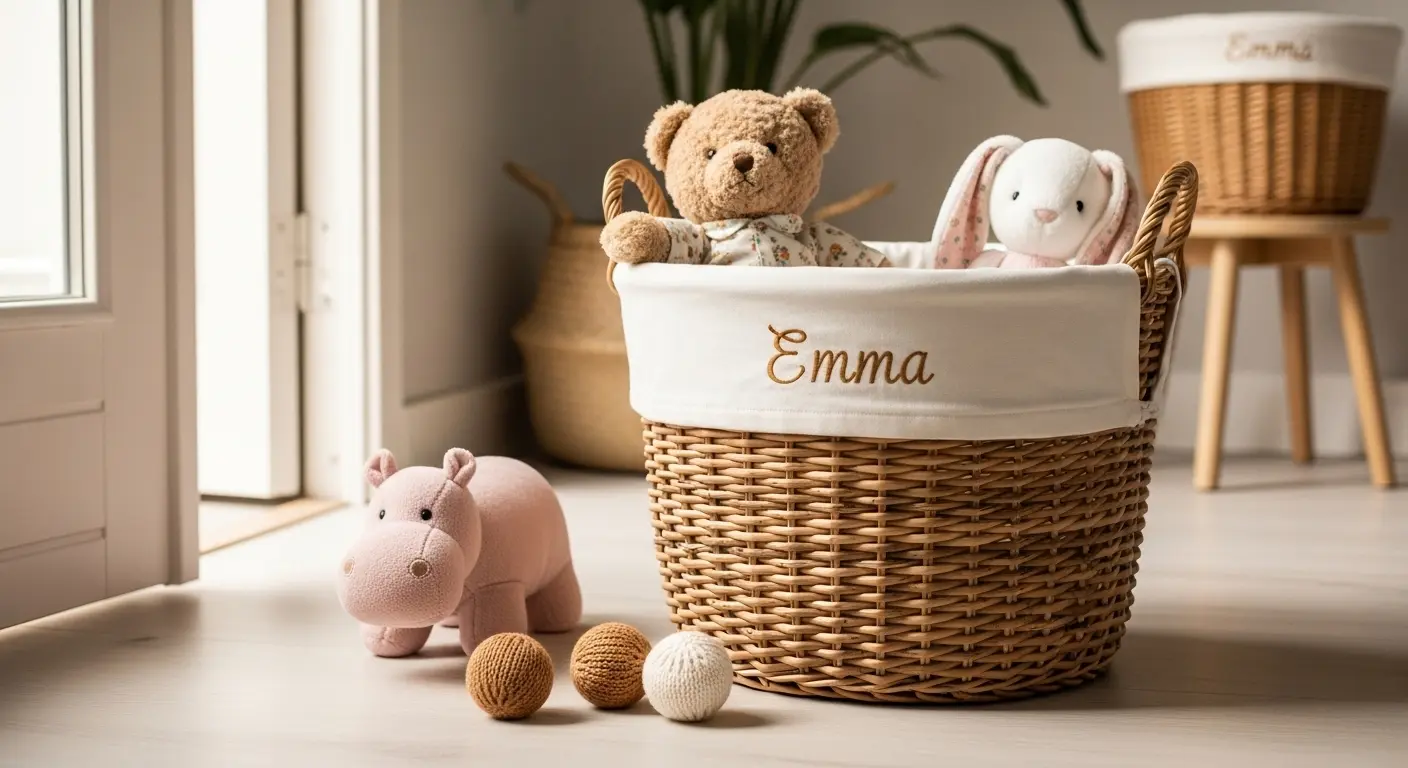
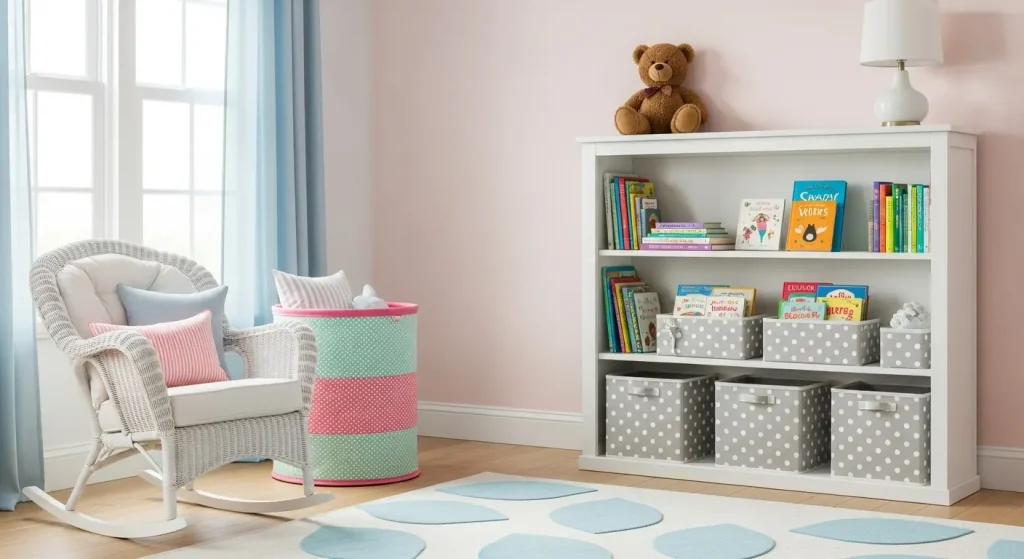
Labeled Baskets
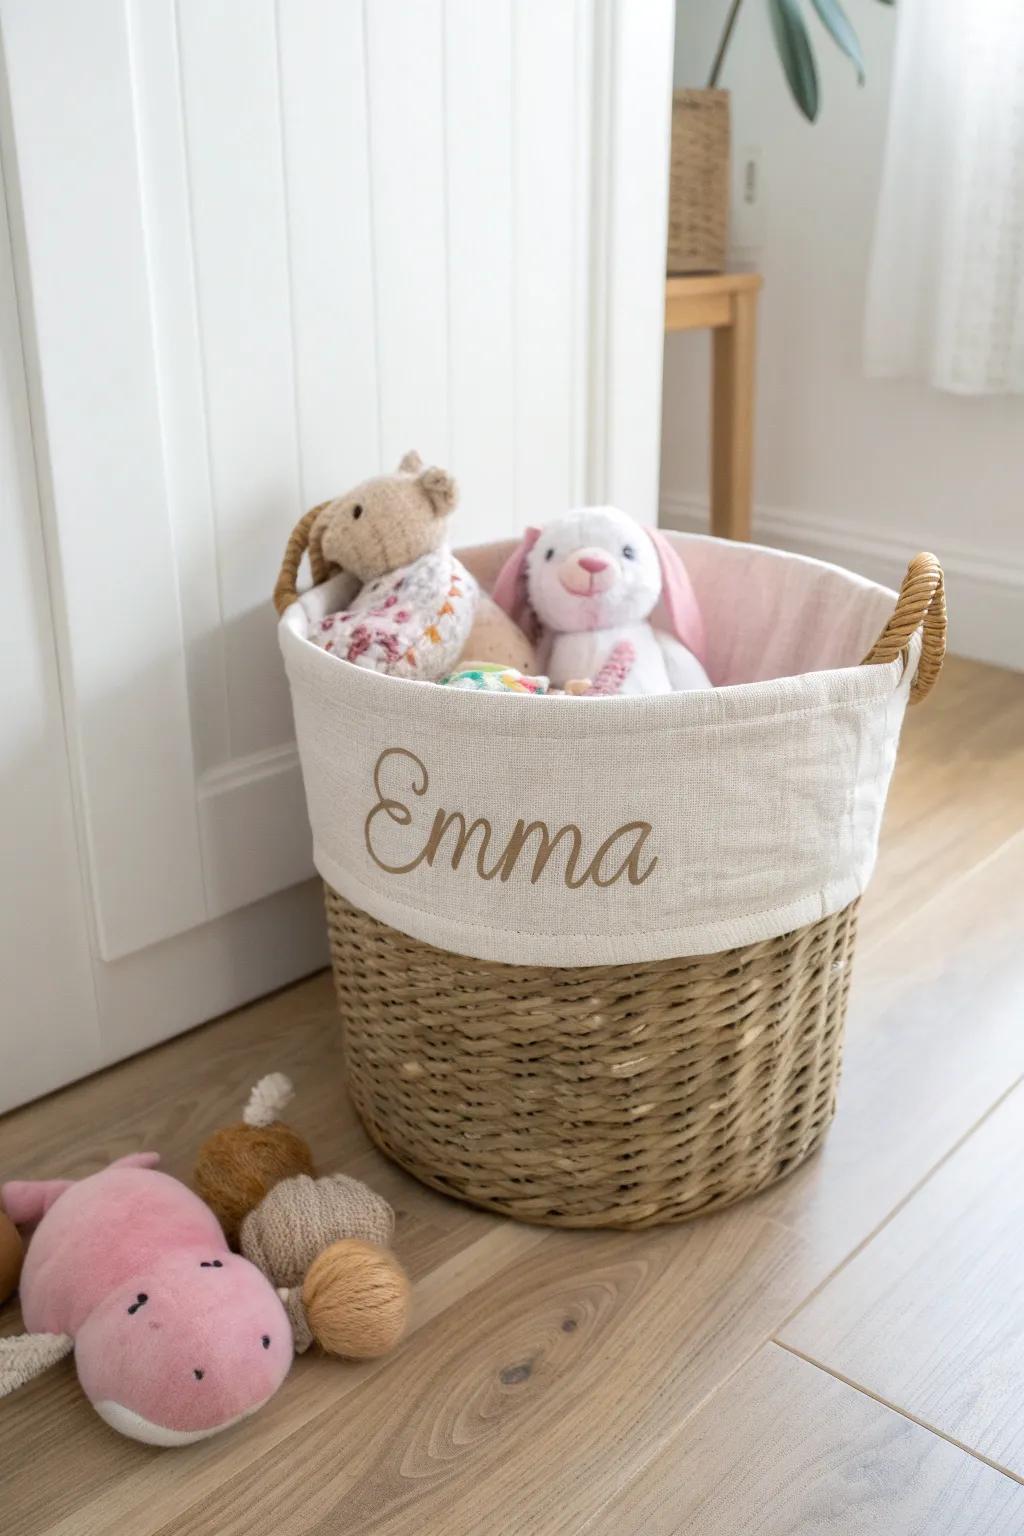
Transform your space with labeled baskets that keep stuffed animals organized and add a personal touch.
To create your custom name toy baskets, you’ll need sturdy baskets in various sizes, adhesive vinyl or fabric for labels, scissors, and a cutting machine (or stencils). Start by selecting baskets that fit your decor, then measure and cut the vinyl or fabric to create labels featuring each child’s name.
Ensure the labels are easy to read and attach them securely to the front of each basket.
Under-the-Bed Storage
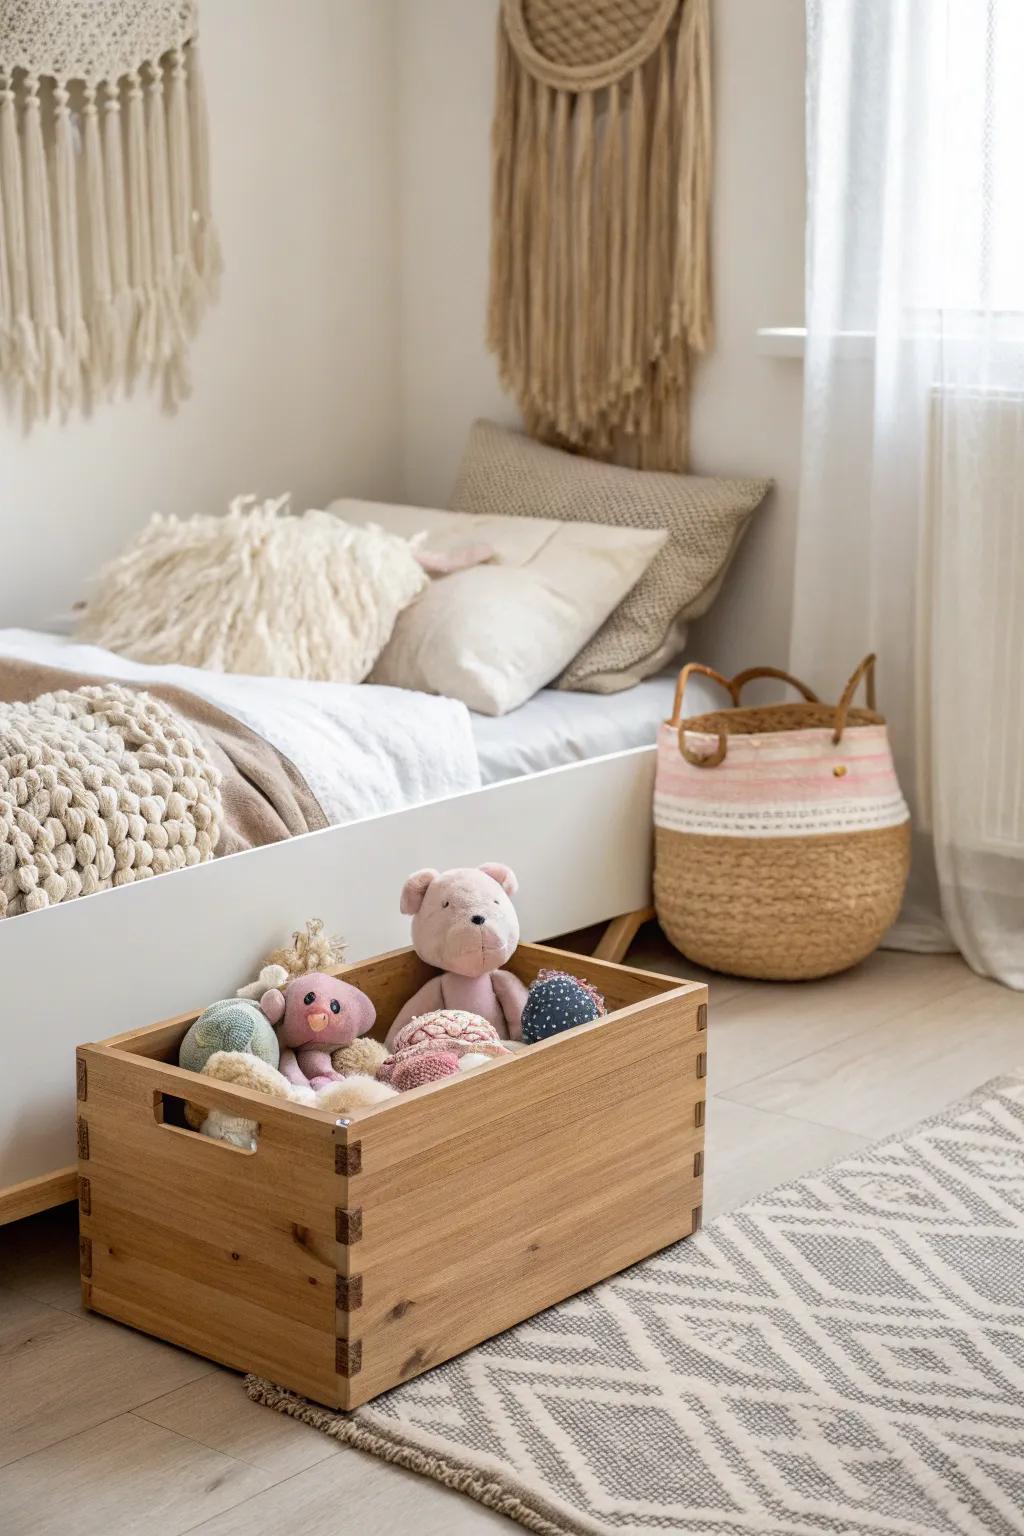
This delightful under-the-bed storage project combines creativity with practicality, making it perfect for seniors seeking engaging activities.
The process uses easily accessible materials and straightforward techniques that accommodate various skill levels.
Whether you’re a beginner or experienced crafter, this project offers opportunities for personal expression while creating something both beautiful and functional.

Clear Storage Bins
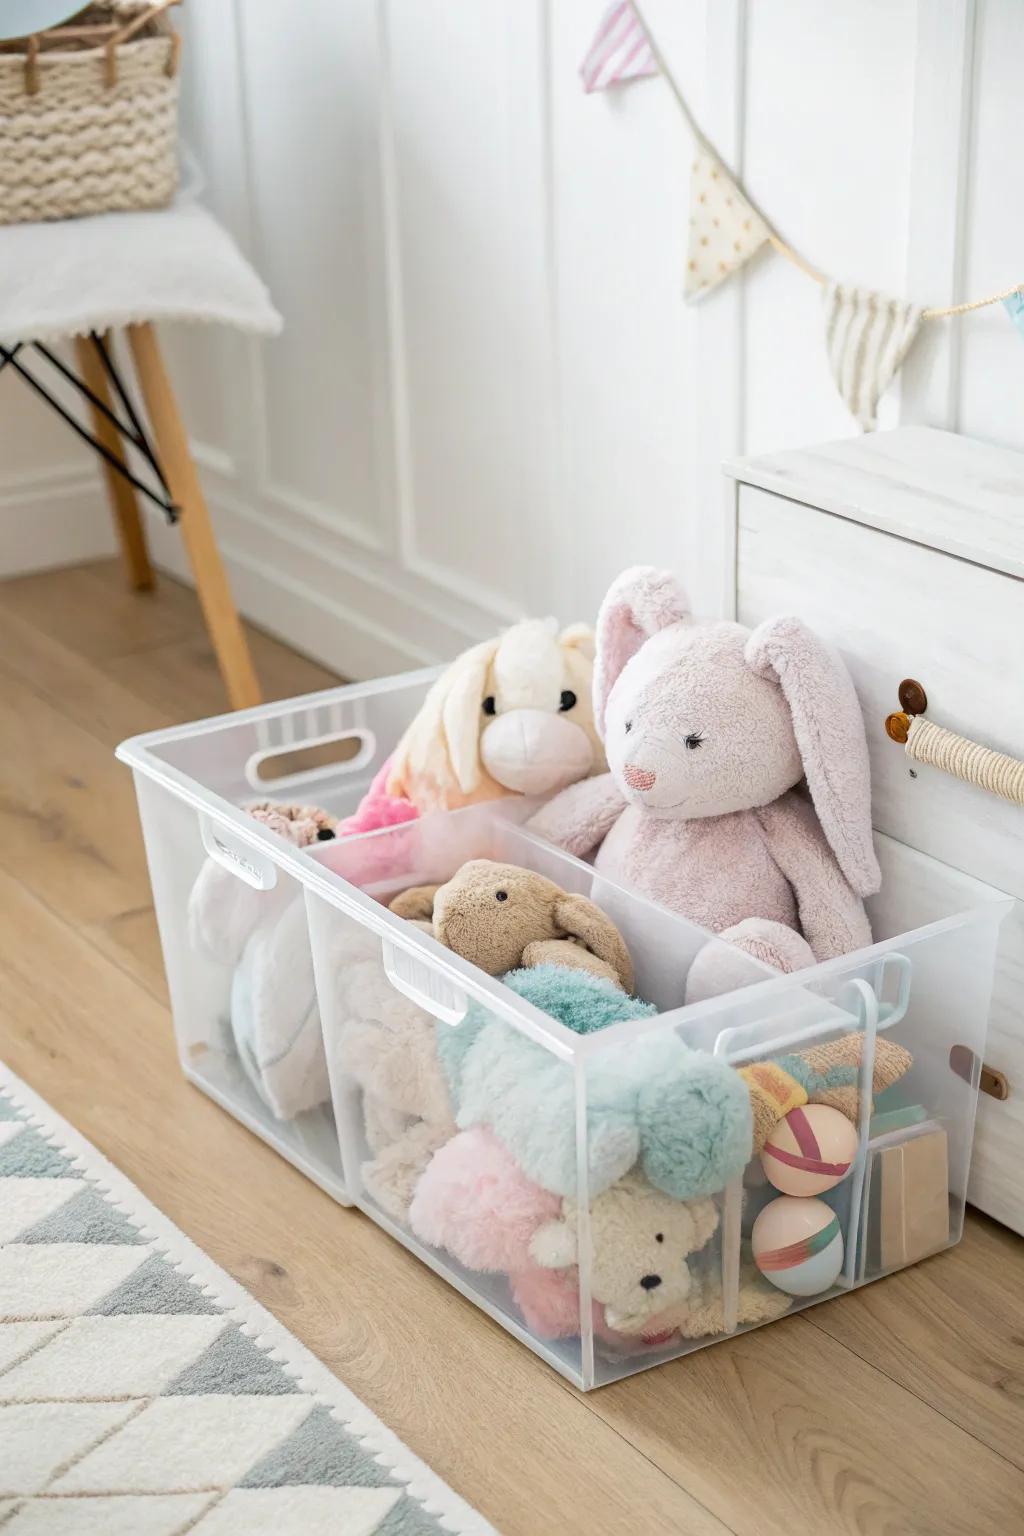
To create your own clear storage bins for stuffed animals, gather the following materials: stackable transparent plastic bins, labels, and a pen. Start by choosing a designated area for your bins, ensuring it’s easily accessible.
Next, sort the stuffed animals by size or type—this will help you decide how to organize them within the bins. Label each bin clearly for quick identification, making sure the labels are large enough for easy reading.
Conclusion
Transforming stuffed animal storage can bring a sense of accomplishment and joy to seniors. By embracing creativity, these innovative solutions not only tidy up spaces but also celebrate the sentimental value of each plush friend. With a bit of crafting, seniors can create functional yet fun storage that reflects their personalities.
As we wrap up, remember that the goal is to make these delightful companions both accessible and beautifully displayed. So gather your supplies, unleash your creativity, and let’s make stuffed animal storage a joyful part of your crafting journey!